
WARNING! This is a long post…
User onboarding is something IT department’s have been doing for years, with the move to Office 365 the process have change a little bit.
This post present a guide on how to automate this process for Office 365.
Thanks to my #awesome colleague Tom-Inge Larsen for his #magical skill with PowerShell | https://blog.codesalot.com/
Thanks to Stefan Stranger, who shared the right way to start a Automation Runbook with webhook | https://blogs.technet.microsoft.com/stefan_stranger/2017/03/18/azure-automation-runbook-webhook-lesson-learned/
Goal:
Create a “low code” solution using Out of the Box services in Office 365 and Azure, to simplify the operational task of creating user accounts and assigning lisenses.
Technology involved:
- A valid Microsoft Office 365 and Azure subscription
- MS Forms | A free tool use to capture data from simple forms and quiz
- MS Flow | Is a service that helps you create automated workflows between your favorite apps and services to synchronize files, get notifications, collect data and more
- SharePoint Online | SharePoint helps you create portals as intranet, extranet to securely collaborate and share informations
- Azure Automation | An Azure service used to configure and automate operational tasks across Azure and on-premises environment
- Azure Automation Hybrid Runbook Worker | Hybrid Runbook Worker feature is used to run runbooks directly on a on-premises computer that’s hosting the role and against local ressources.
- PnP PowerShell | Community driven SharePoint Patterns and Practices (PnP) contains a library of PowerShell commands (PnP PowerShell) that allows you to perform complex provisioning and artifact management actions towards both SharePoint on-premises and Online.
- PowerShell, PowerShell, PowerShell | PowerShell helps system administrators and power-users rapidly automate tasks that manage operating systems (Linux, macOS, and Windows) and processes.
Steps involved:
- Creating MS Form
- Creating MS SharePoint List
- Creating MS Flow to collect responses from Forms
- Create an Azure Automation Account
- Deploy an Azure Automation Hybrid runbook Worker
- Create your PowerShell Runbook
- Create MS Flow to send web hook data to Azure Automation runbook
- Test your solution
Creating the MS Form
The use case for MS Form is often connected to a requirement for anynomous data collection.
Logg in to https://forms.office.com/ with your Office 365 credentials.
Create your form, when done click Share | choose how user can respond and copy the url

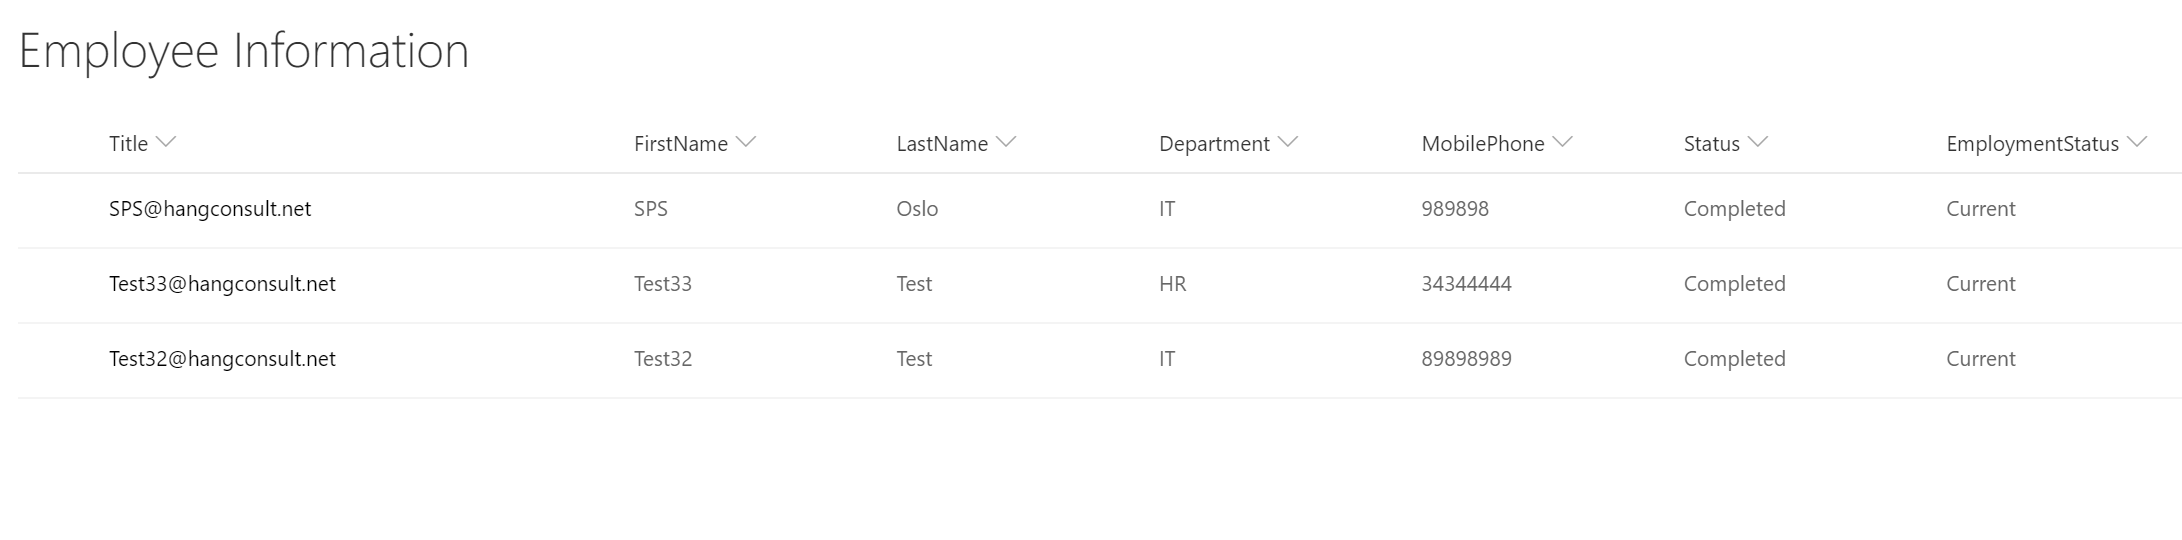
Creating SharePoint List
In SharePoint create a custom list “Employee Information” with the minimun of columns as your MS Form, this list will contain all responses collected through MS Forms
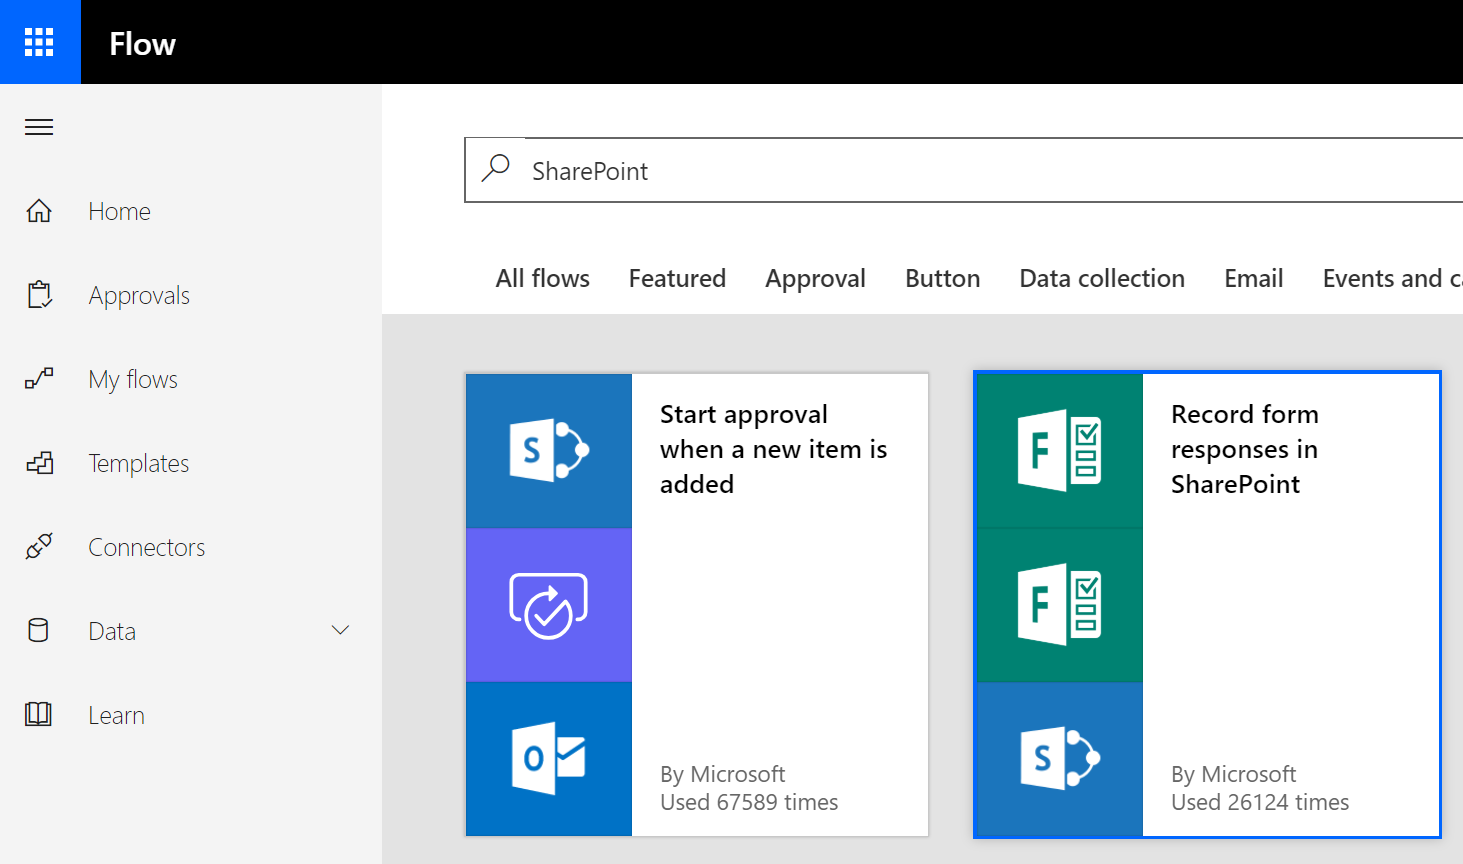
Creating our first Flow
While in the “Employee Information” list using the menu click Flow | Create a flow
Our first flow will be used to collect responses, in the flow management search for “SharePoint” or “Forms” choose the template named “Record form responses in SharePoint”
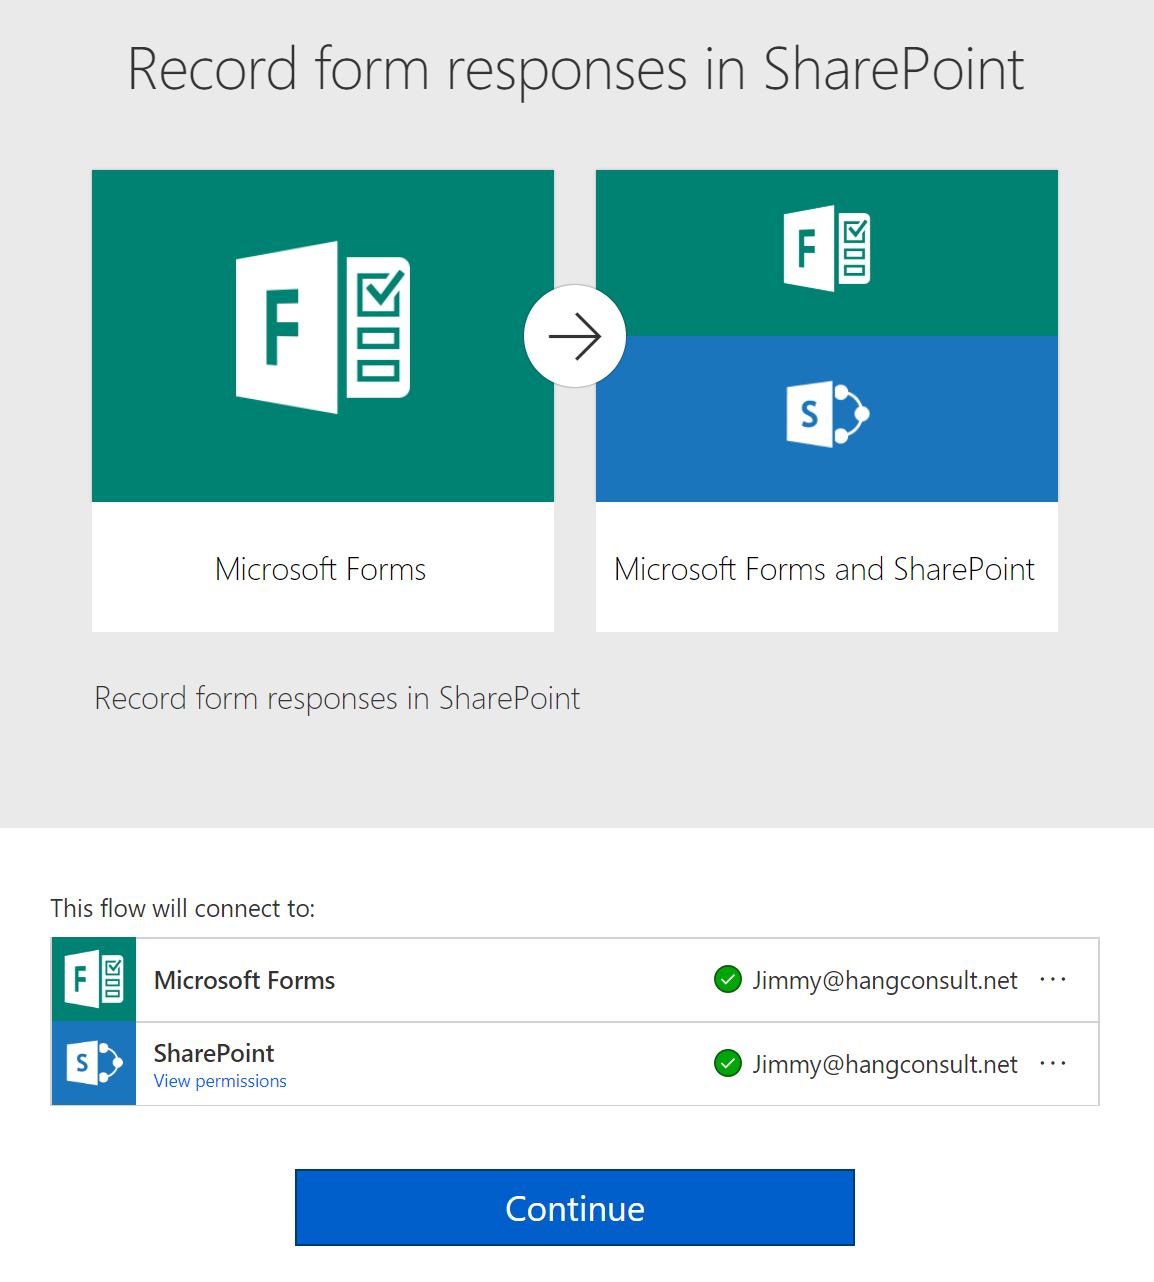
Validate the connections and click Continue
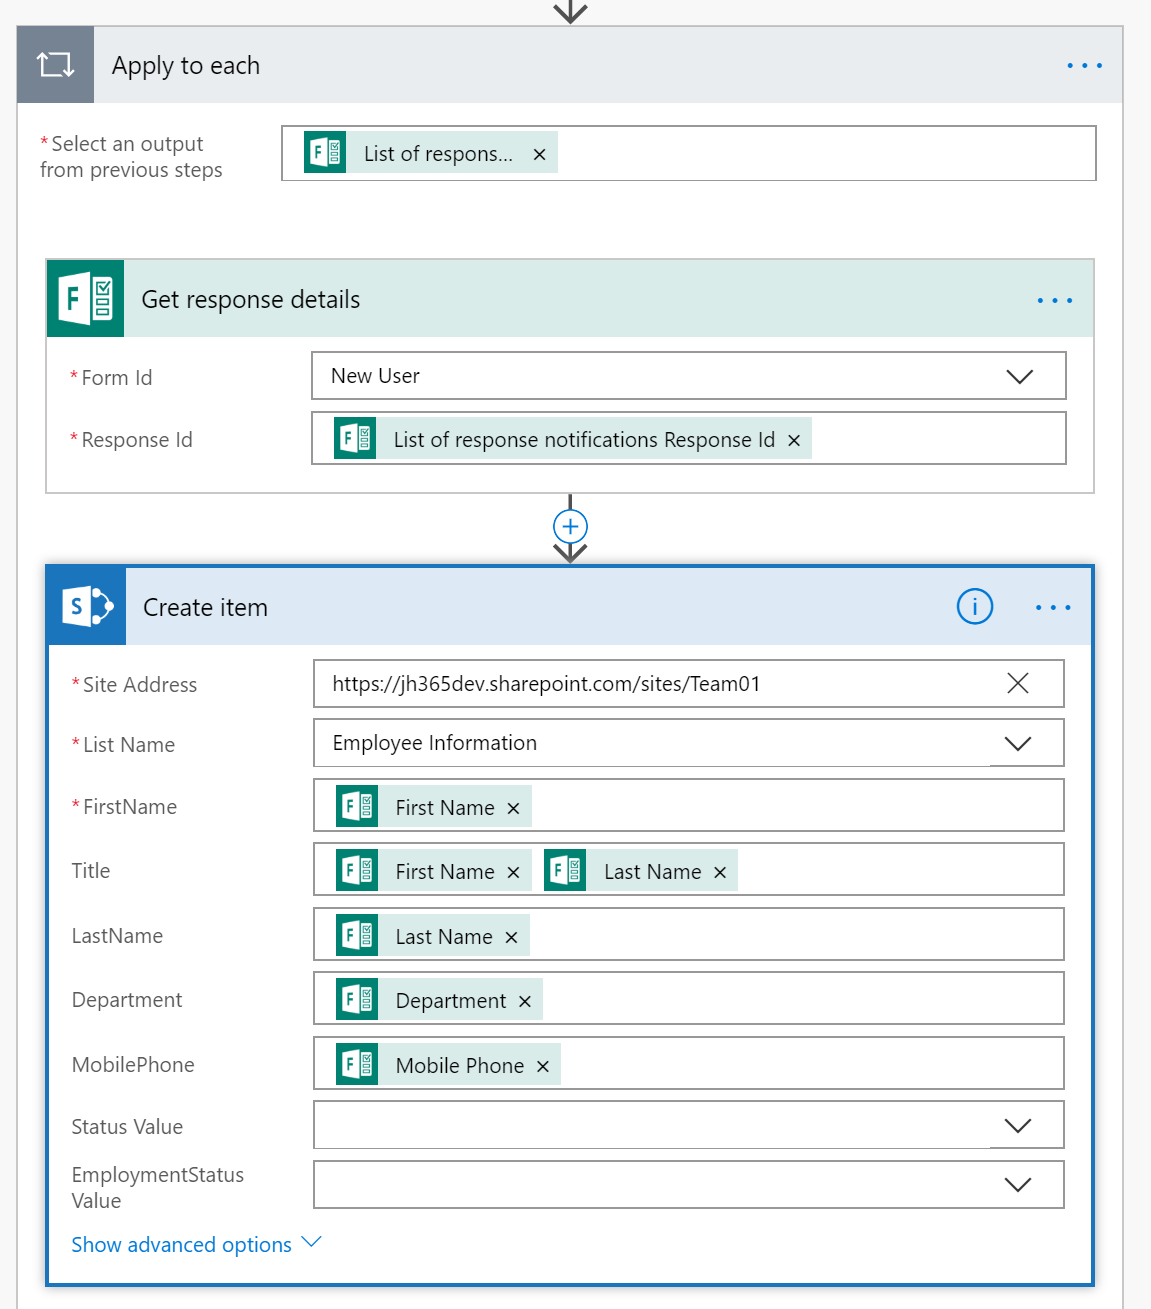
Name your flow | then configure it to connect to the form Id from step one

For each response capture the results then create a new SharePoint list item in the “Employee Information” list.
Save your flow and verify that it works by creating a few responses using the MS Form.
Creating Azure Automation Account
Before you can create an Azure Automation Account, you will need an active Azure Subscription, if unsure use a trial subscription.
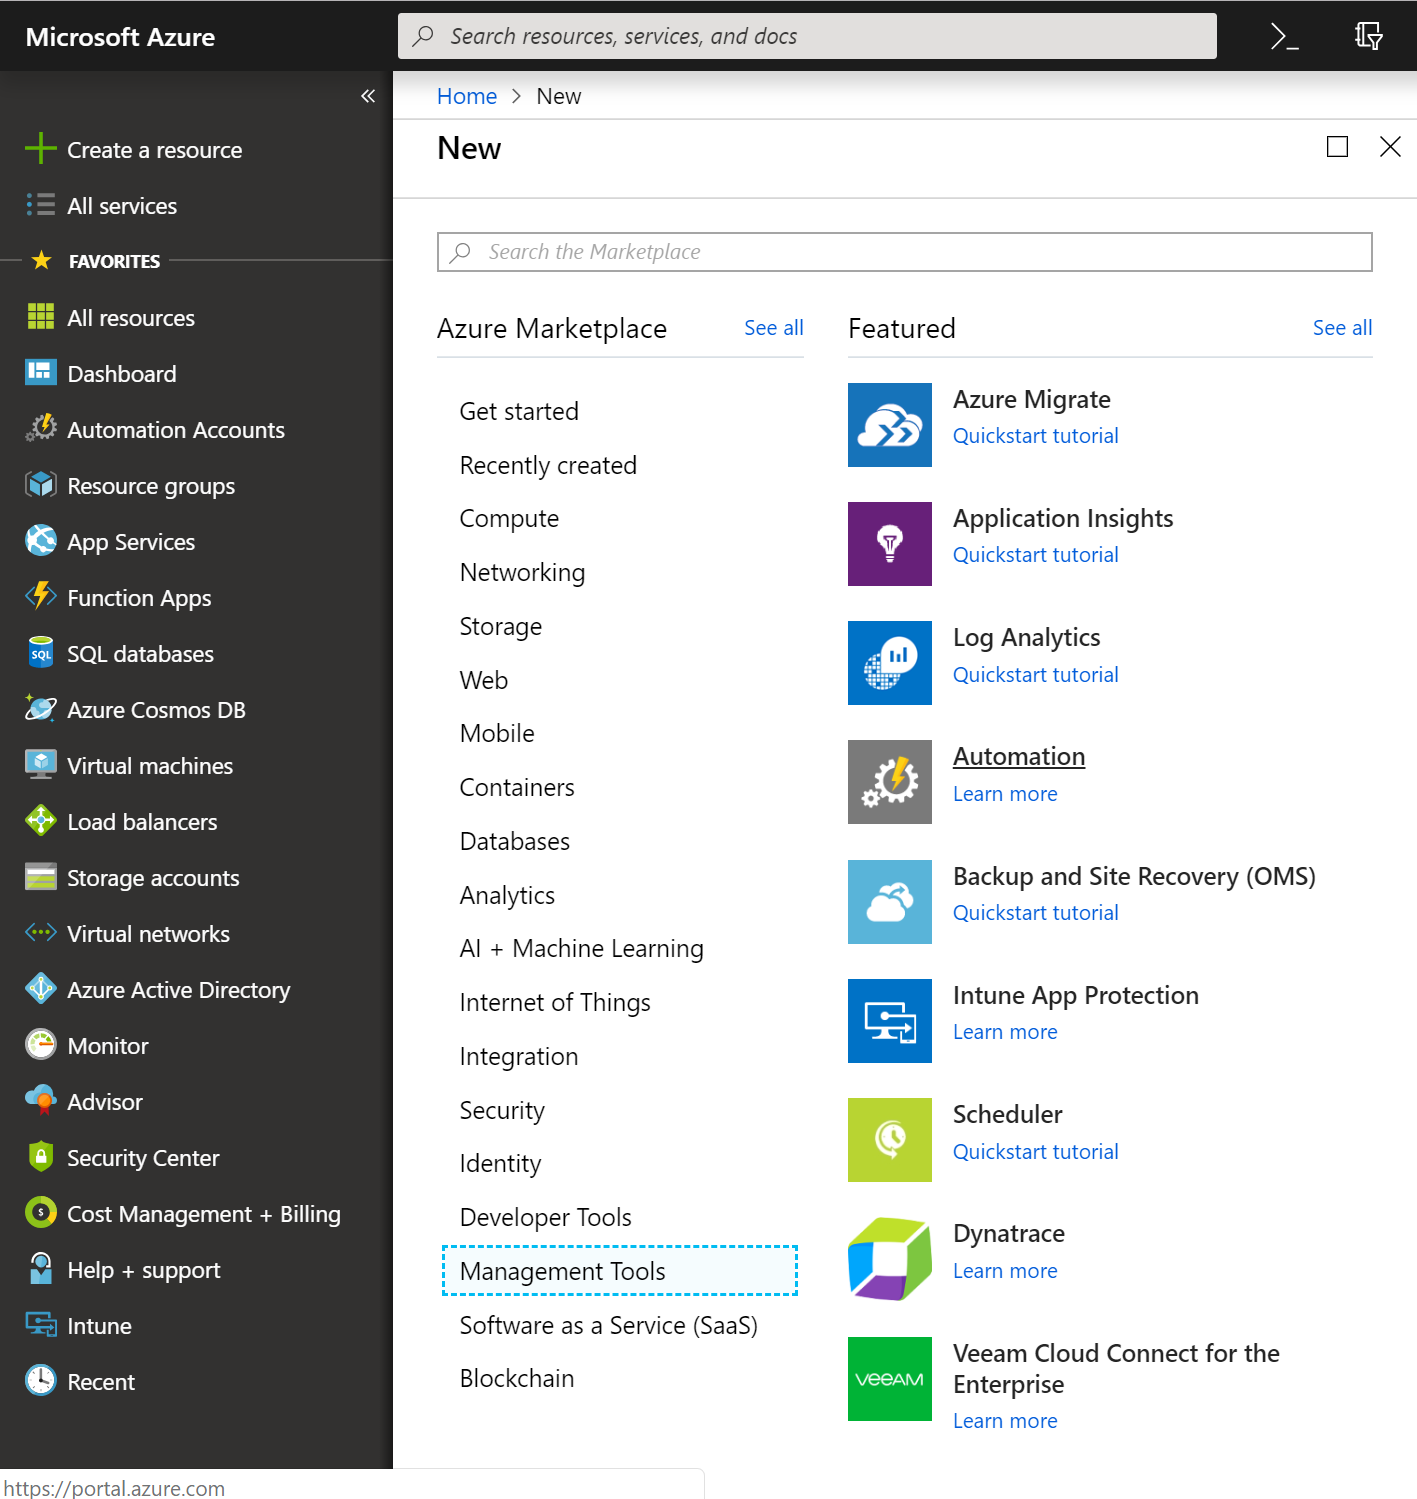
Log in to https://portal.azure.com using your Office 365 global admin account, and subscribe to Azure.
Choose to Create a resource | Management Tools | Automation
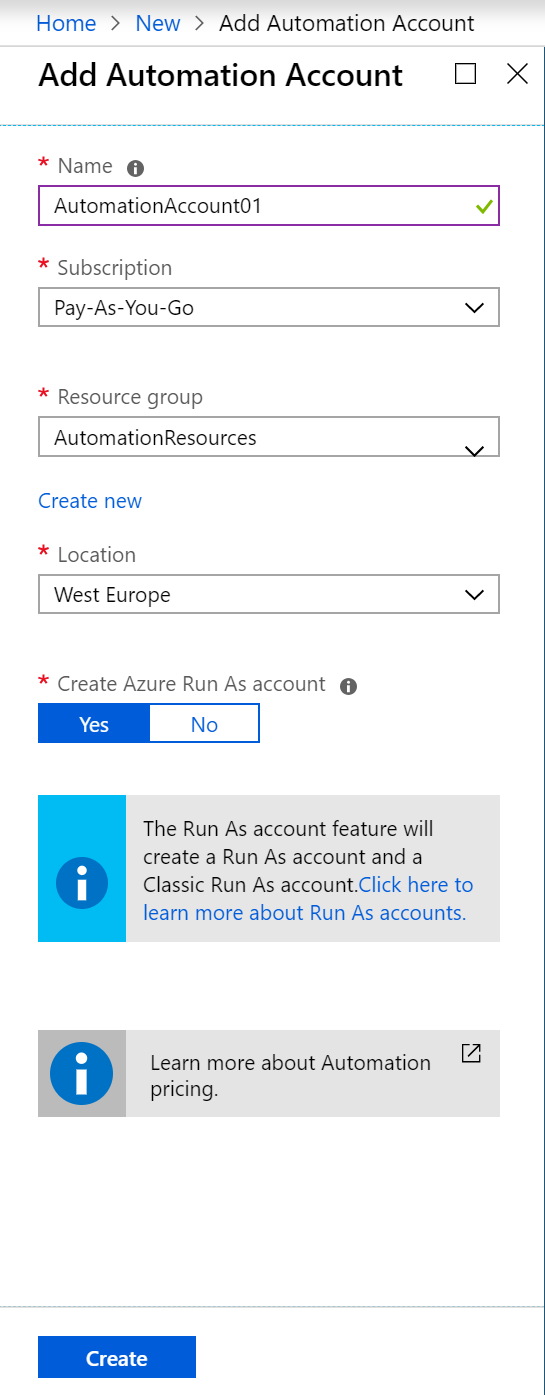
Add required details and choose Create
When the Automation account is ready, you can start creating runbooks that will do the “heavy lifting”.
There is a couple of different runbook types you can choose from dependent on the use case, details here: https://docs.microsoft.com/en-us/azure/automation/automation-runbook-types
For this solution we will use PowerShell Runbooks

You will also need to create a Automation Credentials to be used by the PowerShell scripts, the automation credential account is a service account and it needs Delegated Permission to create users in AD, assigning mailbox, start Azure AD synch, assigning licenses in Office 365. Dependent on the use case this account might need more or less delegated permissions.

Deploy the Hybrid runbook worker
The “Hybrid runbook worker” is the server on premises that’s doing the “heavy lifting”
The minimum requirements for a Windows Hybrid Runbook Worker:
Windows Server 2012 or later.
Windows PowerShell 5.1 or later (download WMF 5.1).
.NET Framework 4.6.2 or later.
Two cores.
4 GB of RAM.
Port 443 (outbound).
To deploy the Hybrid worker, follow the guide from Microsoft here: https://docs.microsoft.com/en-us/azure/automation/automation-windows-hrw-install
.\New-OnPremiseHybridWorker.ps1 -AutomationAccountName <NameofAutomationAccount> -AAResourceGroupName <NameofResourceGroup>`
-OMSResourceGroupName <NameofOResourceGroup> -HybridGroupName <NameofHRWGroup> `
-SubscriptionId <AzureSubscriptionId> -WorkspaceName <NameOfLogAnalyticsWorkspace>
Since we will be doing operational task against Office 365 and SharePoint Online you also need the following PowerShell and tools installed on the server:
For connectivity to Office 365 follow this Guide: https://docs.microsoft.com/en-us/office365/enterprise/powershell/connect-to-office-365-powershell
Install SharePoint Online PowerShell Module: https://docs.microsoft.com/en-us/powershell/sharepoint/sharepoint-online/connect-sharepoint-online?view=sharepoint-ps
Last but not least, SharePoint PnP module: https://docs.microsoft.com/en-us/powershell/sharepoint/sharepoint-pnp/sharepoint-pnp-cmdlets?view=sharepoint-ps
When the Hybrid worker is ready you will find it in your Azure Automation Account:

Creating your PowerShell Runbook
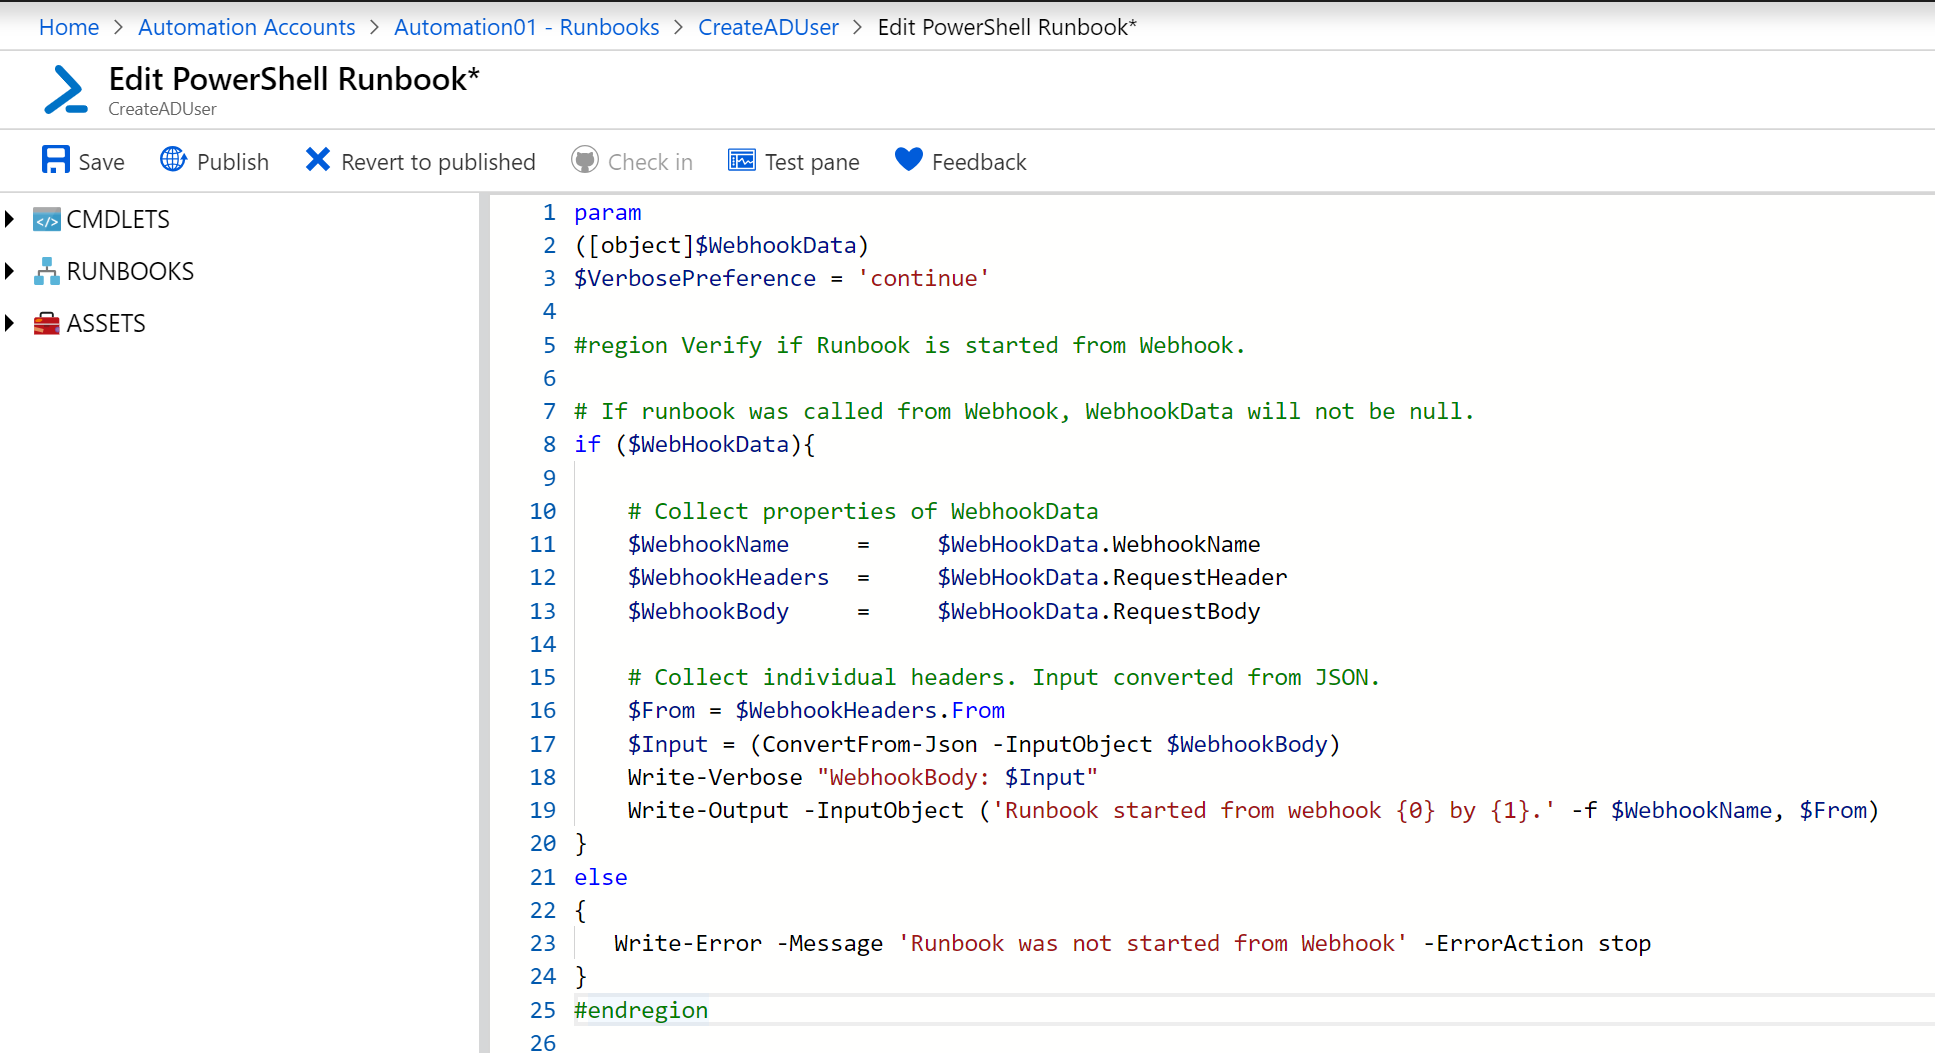
To create a new runbook navigate in your Automation Account, create a new PowerShell type runbook

Add your code, save and publish when ready
#### Sample code for creation of local AD user and assign Office 365 licenses
## Replace values below with your tenant values
param
([object]$WebhookData)
$VerbosePreference = ‘continue’
#region Verify if Runbook is started from Webhook.
# If runbook was called from Webhook, WebhookData will not be null.
if ($WebHookData){
# Collect properties of WebhookData
$WebhookName = $WebHookData.WebhookName
$WebhookHeaders = $WebHookData.RequestHeader
$WebhookBody = $WebHookData.RequestBody
# Collect individual headers. Input converted from JSON.
$From = $WebhookHeaders.From
$Input = (ConvertFrom-Json -InputObject $WebhookBody)
Write-Verbose “WebhookBody: $Input”
Write-Output -InputObject (‘Runbook started from webhook {0} by {1}.’ -f $WebhookName, $From)
}
else
{
Write-Error -Message ‘Runbook was not started from Webhook’ -ErrorAction stop
}
#endregion
$employment = $Input.EmploymentStatus
Write-Output $employment
#Check Employment status
if($employment -eq “New”){
#Updating SharePoint list item status
$SPListItemID = $Input.ListItemID
$spoconn = Connect-PnPOnline –Url https://tenant.sharepoint.com/sites/site –Credentials (Get-AutomationPSCredential -Name ‘AzureAdmin’) -ReturnConnection -Verbose
$itemupdate = Set-PnPListItem -List “Employee Information” -Identity $SPListItemID -Values @{“Status” = “In Progress”} -Connection $spoconn
#Local AD OU
$Path = “OU=Employees,OU=Company,DC=domain,DC=com”
$TemPass = “TempPass” + “$SPListItemID”
Write-Output $TemPass
$ADsplat = @{
SamAccountName = $Input.FirstName
UserPrincipalName = “$($Input.FirstName)`@domain.com”
DisplayName = “$($Input.FirstName) $($Input.LastName)”
Name = “$($Input.FirstName) $($Input.LastName)”
GivenName = $Input.FirstName
SurName = $Input.LastName
ChangePasswordAtLogon = $true
Description = “Created by Azure Automation”
MobilePhone = $Input.Mobilephone
AccountPassword = ConvertTo-SecureString $TemPass -AsPlainText -Force
Department = $Input.Department
Enabled = $true
Path = $Path
}
$SamAccountName = $ADsplat.SamAccountName
$upn = $ADsplat.UserPrincipalName
#Creating account in local AD
New-ADUser @Adsplat
#Updating List Item Title using PnP
$itemupdate = Set-PnPListItem -List “Employee Information” -Identity $SPListItemID -Values @{“Title” = $upn} -Connection $spoconn
#Enable remoe mailbox in Office 365
asnp *exchange*
Enable-RemoteMailbox $SamAccountName -RemoteRoutingAddress $upn
#Gruppemedlemsskap lokal AD
Add-AdGroupMember -Identity “All Users” -Members $SamAccountName
sleep 90
# Start AAD Connect Synch
Start-ADSyncSyncCycle -PolicyType Delta
#Assigning Licenses
Write-Output “Wait Azure AD Sync”
sleep 100
Connect-MsolService -Credential (Get-AutomationPSCredential -Name ‘AzureAdmin’)
Set-MsolUser -UserPrincipalName $upn -UsageLocation NO
Set-MsolUserLicense -UserPrincipalName $upn -AddLicenses “subscription:LisensePack”
#Remove Yammer from User license
$LO = New-MsolLicenseOptions -AccountSkuId “subscription:LisensePack” -DisabledPlans “SWAY”
Set-MsolUserLicense -UserPrincipalName $upn -LicenseOptions $LO
$Endcode = “Completed”
#Update list item using PnP
$itemupdate = Set-PnPListItem -List “Employee Information” -Identity $SPListItemID -Values @{“Status” = “$Endcode”; “EmploymentStatus” = “Current”} -Connection $spoconn
Write-Output “Done…”
}
elseIf($employment -eq “Terminated”){
$user = Get-ADUser -Identity $Input.FirstName
Disable-ADAccount -Identity $user
Move-ADObject -Identity $user.ObjectGUID -TargetPath “OU=Terminated,OU=Company,DC=domain,DC=com”
Write-Output “User Account Disabled”
}
else{
Write-Output “Nothing to do..moving on…”
}
###### END Sample code
After you have saved and published your runbook you need to create a webhook endpoint.
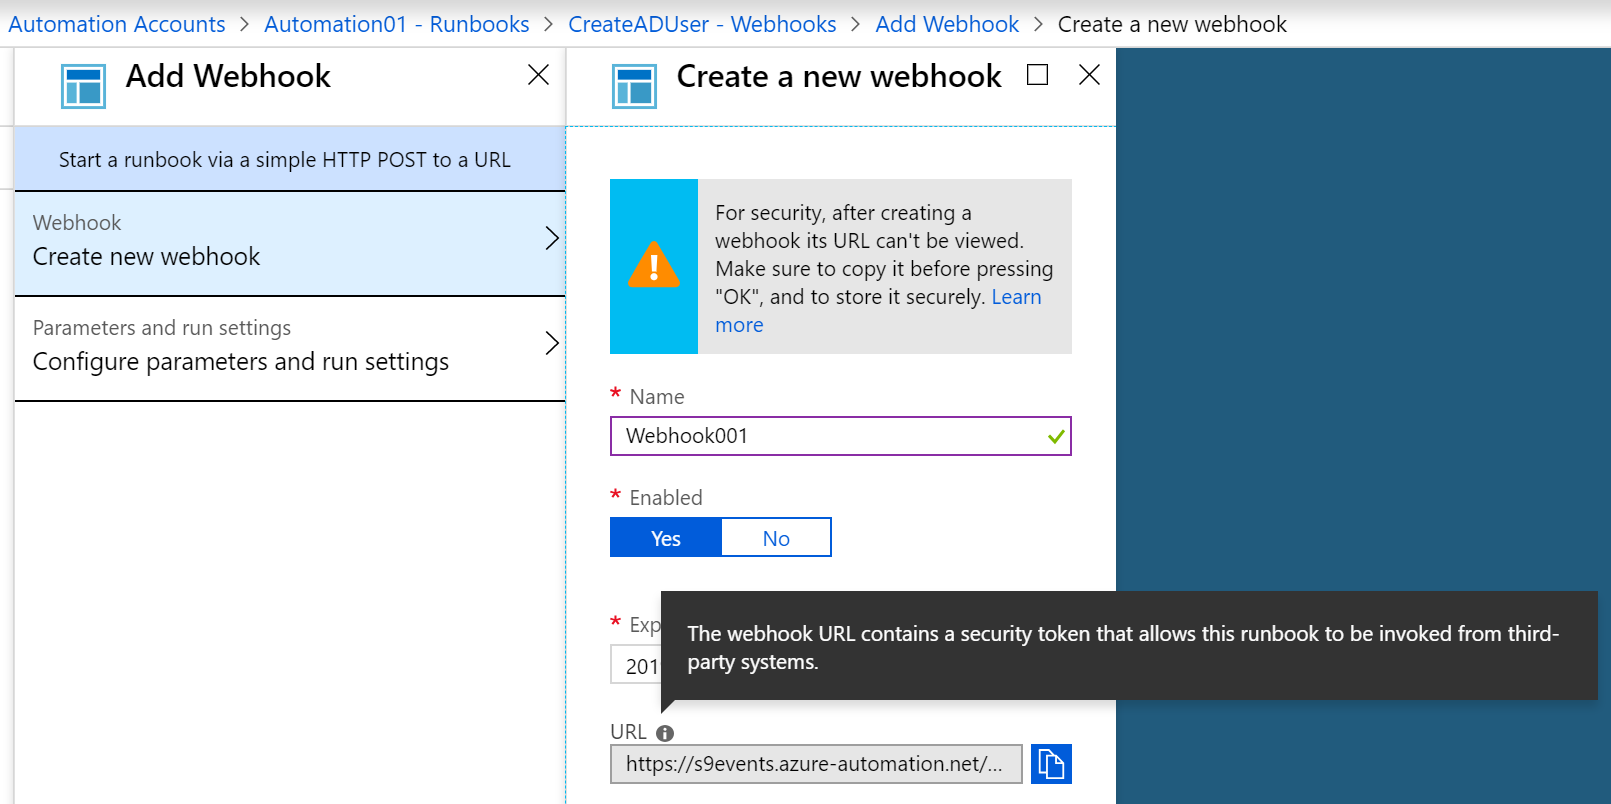
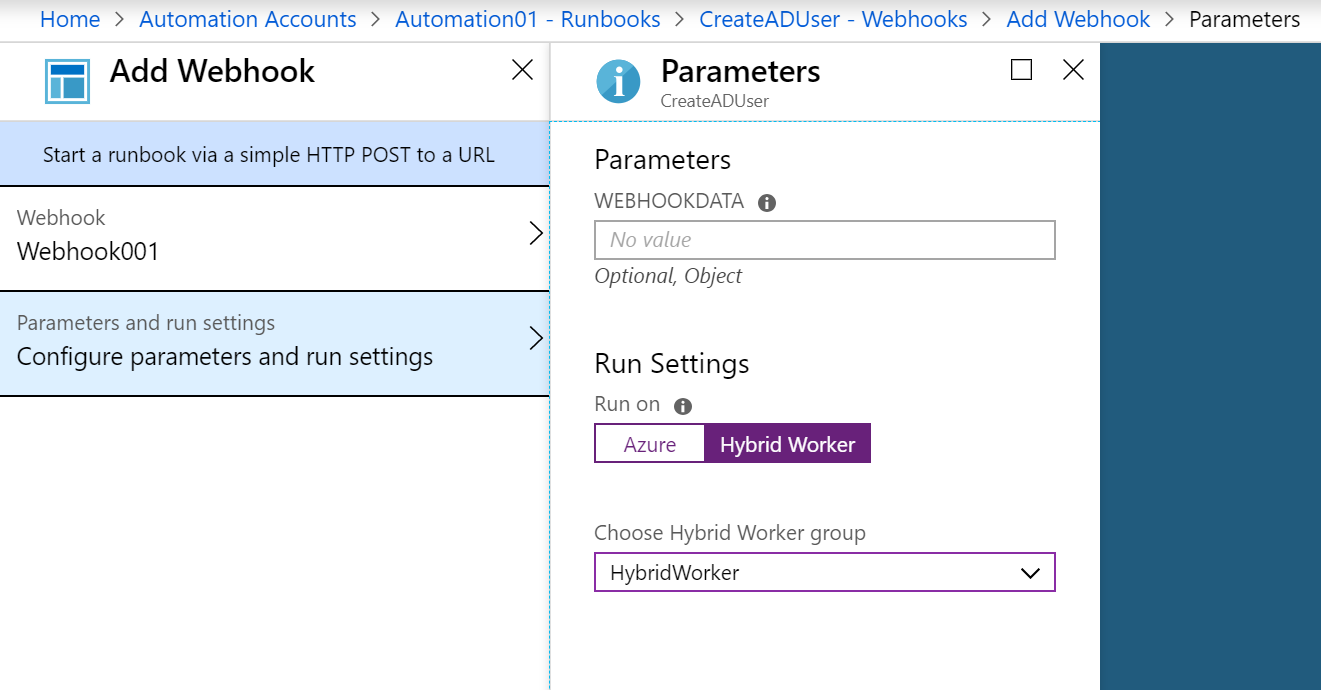
In Azure choose your runbook, in the left menu choose “Webhooks” | “Add Webhook”
Give your webhook a name and take a copy of the URL and Saves it in a safe place, because this URL contains authentication token and is gone after you create it.
On the parameter blade leave the Webhookdata field blank, but the “Run Setting” should be set to “Hybrid Worker” and the correct worker group.
Create your second Flow to send data to the Webhook
Now go back to our SharePoint Employee Information list and create a second flow, the second flow should invoke the webhook and magic should happen.
The important things to remember here is the “Webhook URI” and the json content in body wich will be sent to Azure Automation Runbook.

Test your runbook by creating a new response and verify that the new account is created in local AD then synched to Office 365.
Have Fun with Azure Automation and Office 365, 🙂

Pingback: Low code low cost Teams Governance – My SharePoint Log
Hi, great tutorial!
Would you still recommend this way of User Onboarding or is there by now more you would do via Flow?
LikeLike
Hi E, it depends on your use case, generally if it’s cloud only user, then you can probably do most of it through Flow, but I feel more comfortable doing opreations in PowerShell and will prefer Azure Automation. Also if you need to provision on-premises users first, beacuse you still have local AD, then I’ll recommend using hybrid automation described in this article. Cheers
LikeLike
Hi Jimmy, great info. To create users at on-prem AD from azure, does it need any paid version of Azure AD? Also if we want to manage the license from on-prem AD using group based licensing feature of office 365, does this can be accomplished?
LikeLike
Hi Shaikp, no you don’t need any special Azure AD lisenses and yes you can use Group based lisensing, 😉
LikeLike
Great tutorial – real shame though that MS are charging for the flows to http. But I am thinking it’s well worth that little cost for this automation 🙂
LikeLike
Jepp, but fortunately we only need one license for the Flow service account, 😉
LikeLike
I would like to add an approval step to the process prior to Azure process part. How can this be added.
LikeLike
Hi Scott, you can add an approval step right before calling the Azure Automation step, then use a condition to check the approcal result, if approved continune to Azure Automation, if rejected stop the flow.
LikeLike
Hi Jimmy,
Do you have something similar to add/remove users automatically from distribution groups as soon as users submit service now tickets…..
LikeLike